Adding SSL to your Site
In this article we're going to look at adding SSL to our site, first in development and then in Production using Let's Encrypt.
We're going to start where we left off in the last article.
If you need to catch up:
git clone https://github.com/lawwantsin/webpack-course.git
cd webpack-course
git checkout ssl
npm install
Creating a Local SSL Certificate
We're going to create a few new files with openssl. Let's add a new folder to hold them.
In terminal:
mkdir config/ssl
cd config/ssl
Okay, now that we're inside config/ssl let's generate a private key for our new Certificate authority.
In terminal:
openssl genrsa -des3 -out myAuthority.key 2048
Enter a passphrase and that's done. Now let's generate a root certificate.
openssl req -x509 -new -nodes -key myAuthority.key -sha256 -days 1825 -out myAuthority.pem
This asks you a bunch of questions. Answer them as best you can, knowing you're the only one who will see the answers.
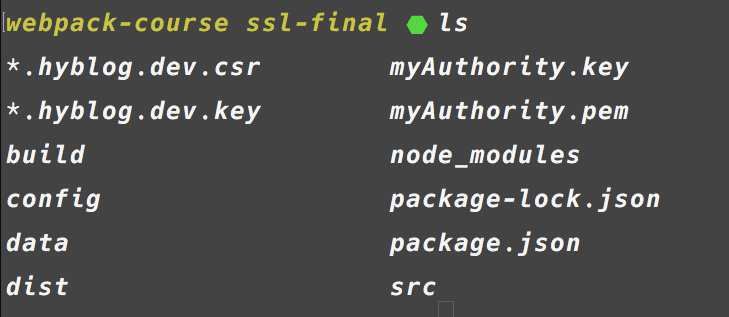
Now you should have 2 files. myAuthority.key and myAuthority.pem.
Adding it to OSX Keychain
Command+Space and search for Keychain Access app.
Goto File then Import Items...
In your project folder the .pem file ie. myAuthority.pem.
In the search, we search for Hyrule. Double click.
In the Trust section, we select Always Trust.
Enter your password again.
You are now a Certificate Authority, at least as far as your own computer is concerned. You can now issue yourself 2 certificates, one for each site. If you development sites were all under 1 domain, and used sub-domains to differentiate, you'd only need to create one.
Create Certificate for Local Sites
openssl genrsa -out multisite.local.key 2048
openssl req -new -key multisite.local.key -out multisite.local.csr
Now we have some new files:

touch multisite.local.ext
Inside:
authorityKeyIdentifier=keyid,issuer
basicConstraints=CA:FALSE
keyUsage = digitalSignature, nonRepudiation, keyEncipherment, dataEncipherment
subjectAltName = @alt_names

[alt_names]
DNS.1 = multisite.local
DNS.2 = multisite.local.192.168.1.19.xip.io
Then in terminal:
openssl x509 -req -in multisite.local.csr -CA myAuthority.pem -CAkey myAuthority.key -CAcreateserial \
-out multisite.local.crt -days 1825 -sha256 -extfile multisite.local.ext
Okay, now we've got a whole bunch of files in our config/ssl folder. I'm going to include these in the github repo for not breaking the sample source's sake, but you'd probably want to .gitignore these so they don't wind up in your source code.
Configure our Server for SSL
Let's add this to our server.
Inside express.js let's import the https and fs packages and change a few things in the done function.
import https from "https"
import fs from "fs"

const options = {
  key: fs.readFileSync("./multisite.local.key"),
  cert: fs.readFileSync("./multisite.crt"),
  requestCert: false,
  rejectUnauthorized: false
}

const done = () => {
  if (isBuilt) return
  if (isDev) server = https.createServer(httpsOptions, server)
  server.listen(PORT, () => {
    isBuilt = true
    console.log(
      `Server listening on https://*.multisite.local:${PORT} in ${
        process.env.NODE_ENV
      }`
    )
  })
}
Now in the browser, we can go to https://multisite.local:8080/article/post and see our post using encryption.
If you get a CA Certificate invalid error, you'll want to set this variable in your environment.
process.env["NODE_TLS_REJECT_UNAUTHORIZED"] = 0
In Production
If we output the appropriate files and then test what it'll look like on Heroku.
npm run prod
heroku local
We can see it loads fine on port 5000. But all is not well. Even though our SSR was working just fine in development, it is output as "Loading...." in production.
On Heroku
SSL is already setup for Heroku by default on the herokuapp.com domain. If you'd like to set it up on your own domain, you should. it's free.
You need to point your domain name at
exampleapp.herokudns.com
Then add it to your app and enable the encryption.
In the terminal:
heroku domain:add www.example.com
heroku domain:add example.com
heroku certs:auto:enable --app exampleapp
More info here: https://devcenter.heroku.com/articles/automated-certificate-management
In Sum
We've got SSL working locally for our 2 .local top level domains. Pretty cool. We can separate our clients on a per domain basis, while still always resolving to 127.0.0.1.
git checkout ssl-final
<<<<<<< HEAD
Thank You
That's it for the Webpack Course. I hope you enjoyed it.
That is the end of our webpack course. Thanks for reading.
staging
The End