Multiple Pages with React Router
In this article we're going to get started hooking up React Router, so we can get multiple pages going in our blog on both the Client and Server side.
We're going to start where we left off in
the last article.
If you need to catch up:
git clone https://github.com/lawwantsin/webpack-course.git
cd webpack-course
git checkout react-router
npm install
React Router
React Router is a component based way to setup routing in our app. I'm using it here because they've been a vocal part of the Server side rendering and Dynamic importing conversation. It's also a great supplemental library for all your React projects.
In terminal:
npm i react-router react-router-dom
We need to make our blog better. Let's add 2 more pages to the blog. The gallery page, which will list our articles and the article page, which will render our individual posts. We'll leave what we have so far as an about page.
In AppRoot.js, let's add some page level components,
import React from 'react'
const MarkdownData = require('../../data/post.md')
const imagePath = require('../images/link.jpg')
import { BrowserRouter as Router, Route, Link } from 'react-router-dom'

const About = () => (
  <div className="profile">
    <img src={imagePath} />
    <h1 id="title">{MarkdownData.title}</h1>
    <div
      className="content"
      dangerouslySetInnerHTML={{ __html: MarkdownData.__content }}
    />
  </div>
)

const Gallery = () => (
  <div>
    <h1>Gallery</h1>
  </div>
)

const Article = () => (
  <div>
    <h1>Article</h1>
  </div>
)

export default class extends React.Component {
  constructor(props) {
    super(props)
    this.state = {}
  }

  render() {
    return (
      <Router>
        <div>
          <div className="nav">
            <Link to="/">Gallery</Link>
            <Link to="/about">About</Link>
            <Link to="/article">Article</Link>
          </div>
          <Route exact path="/" component={Gallery} />
          <Route path="/about" component={About} />
          <Route path="/article" component={Article} />
        </div>
      </Router>
    )
  }
}
We moved the profile stuff to an About component. We then create 2 empty components, Gallery and Article, which we'll fill in later. We set up the root of our routes in the render function. Link and Route are paired up inside a Router component and that's it. As long as the to attributes match the path attributes you're good to go.
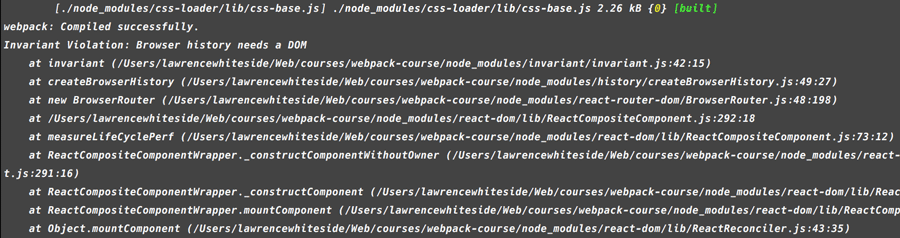
If we restart our server and in our browser we see an error having to do with our server side needing a StaticRouter.
We'll get to that in one minute, but first, let's disable server side rendering, just to see how easy it is to switch back and forth.
In webpack.dev-config.js. Let's uncomment these lines, or if you deleted them, write them back in.
const HTMLWebpackPlugin = require('html-webpack-plugin')

new HTMLWebpackPlugin({
  template: './src/index.ejs',
  inject: true,
  title: "Link's Journal",
})
And in src/server/main.js comment out the HotServerMiddleware:
// server.use(webpackHotServerMiddleware(compiler))
Okay, now we can rerun our server and, it's working.

Unstyled but working. At the top, let's import a new stylesheet to get our navigation looking better.
In AppRoot.js:
import './nav.css'
In src/components/nav.css let's update the look of our navigation:
.nav {
  width: 100%;
  line-height: 2em;
  background-color: black;
}

.nav a {
  color: white;
  text-decoration: none;
  padding: 0 20px;
}
And in main.css let's make the h1 style every page the same. Instead of .profile > h1.
h1 {
  font-size: 5em;
  font-family: sans-serif;
  color: white;
  text-shadow: 0 0 20px black;
  text-align: left;
}
That looks better. And it works. It switches between pages beautifully!
We Broke HMR
Now, you'll notice we've lost the Hot reloading on the CSS changes. That happened in the last episode when we switched out our style-loader for the ExtractTextPlugin so that main.css would be output. There's a great way to get it working again, but let's leave it as is for now and move onto Routing on the server.
Server-Side React Router
To get server side routing working, we need 2 things to happen. First, we want to use the same routes for both client and server. So let's take the routes out of AppRoot.js and place them in a new file. While we're at it let's do the same for our 3 components.
In terminal:
cd src/components
touch Routes.js About.js Gallery.js Article.js
Inside Routes.js let's copy over the react router code in AppRoot.js:
AppRoot.js should look like:
import React from 'react'
import { BrowserRouter } from 'react-router-dom'
const Routes = require('./Routes')
require('./nav.css')

export default class extends React.Component {
  constructor(props) {
    super(props)
    this.state = {}
  }

  render() {
    return (
      <BrowserRouter>
        <Routes />
      </BrowserRouter>
    )
  }
}
Routes.js should look like:
import React from 'react'
import { Route, Link } from 'react-router-dom'
import Gallery from './Gallery'
import About from './About'
import Article from './Article'

export default ({}) => (
  <div>
    <div className="nav">
      <Link to="/">Gallery</Link>
      <Link to="/about">About</Link>
      <Link to="/article">Article</Link>
    </div>
    <Route exact path="/" component={Gallery} />
    <Route path="/about" component={About} />
    <Route path="/article" component={Article} />
  </div>
)
In About.js:
import React from 'react'
const MarkdownData = require('../../data/post.md')
const imagePath = require('../images/link.jpg')

export default () => (
  <div className="profile">
    <img src={imagePath} />
    <h1 id="title">{MarkdownData.title}</h1>
    <div
      className="content"
      dangerouslySetInnerHTML={{ __html: MarkdownData.__content }}
    />
  </div>
)
In Gallery.js:
import React from 'react'

export default () => (
  <div>
    <h1>Gallery</h1>
  </div>
)
In Article.js:
import React from 'react'

export default () => (
  <div>
    <h1>Article</h1>
  </div>
)
Now we need to change our server to render using the StaticRouter. StaticRouter takes the same routes as the BrowserRouter on the client side, and provides a simple way to hookup SSR in Routing.
In render.js at the top.
const { StaticRouter } = require('react-router')
Inside the res.send():
<div id="react-root">
  $
  {ReactDOM.renderToString(
    <StaticRouter location={req.originalUrl} context={{}}>
      <Routes />
    </StaticRouter>
  )}
</div>
Notice we're getting out route from req.originalUrl and we're passing an empty object to context as that is required by StaticRouter, but not needed here. Cool. Now when we rerun it we see the routes reload and have real markup in the source. How does prod look?
npm run prod
Looks good too. Wow, we've build something real here. Now to get these pages come content. Right after we wrap up this section with the universal dynamic imports.
In Sum
In this article we hooked React Router into our client and server side rendering, making 2 new pages for our Blog and separating our pages into their own components. We also looked at unhooking the server side temporarily. If you need to look at the final code:
git checkout react-router-final
Up Next
Next we're going to finish off our Universal rendering build with the inclusion of Dynamic Imports. By the end of the next lesson we'll be serving individual Javascript and CSS bundles for each page in our Blog. See you there.