Theming CSS
In this article we're going to look at scoping our CSS, as we further separate our sub-sites.
We're going to start where we left off in the last article.
If you need to catch up:
git clone https://github.com/lawwantsin/webpack-course.git
cd webpack-course
git checkout theming-css
npm install
So we're working through our exercise in splitting an app by domain. We want to add a kind of theming to these individual sites. Providing a way to separate the look and feel of an individual blog without affecting the others.
To do that we have to decide where we want our css to live. At least in the case of the themes. We're going to pull in css by folders named after our domains.
In terminal:
cd src/css
mkdir link zelda
touch link/theme.css zelda/theme.css
Now we pull in that theming using dynamic import() and the props.site again. We do so inside a component's render function or, in the case of Article.js, above the return.
In Article.js, let's the work we started in About.js:
import React from "react"
import "../css/About.css"

export default props => {
  const siteConfig = require(`../../data/${props.site}/siteConfig.js`)
  const imagePath = require(`../images/${siteConfig.aboutImage}`)
  const MarkdownData = require(`../../data/${props.site}/post.md`)

  import(`../css/${props.site}/theme.css`) // Add this line.

  return (
    <div>
      <div className="profile">
        <img src={imagePath} />
        <h1>{MarkdownData.title}</h1>
        <div
          className="content"
          dangerouslySetInnerHTML={{ __html: MarkdownData.__content }}
        />
      </div>
    </div>
  )
}
Update the Routes.js so that the Article route looks like the About route:
<Route
  path="/article/:slug"
  render={({ staticContext }) => {
    const site = staticContext
      ? staticContext.site
      : location.hostname.split(".")[0]
    return <UniversalComponent site={site} match={match} page="Article" />
  }}
/>
We're also getting the match prop and spreading it into our Article component. This will let us access the named parameter slug and we'll use that slug to fetch a particular article.
Take the background color out of main.css.
body {
  margin: 0;
  font-family: Helvetica;
}
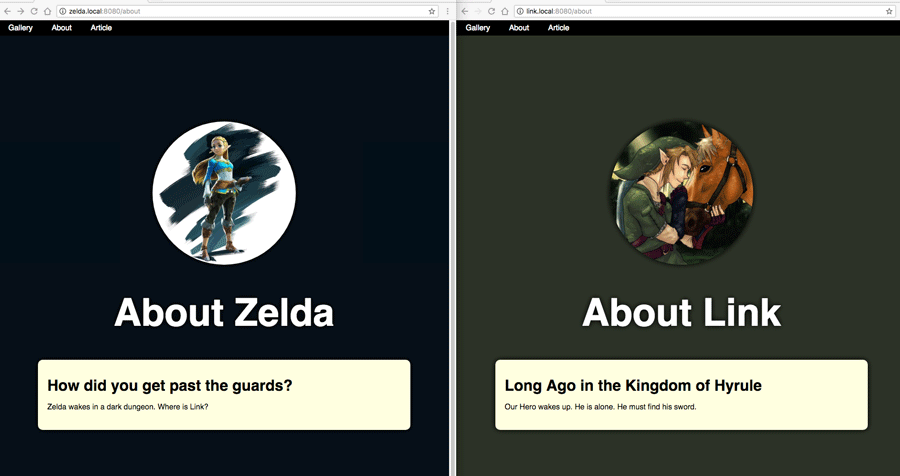
We want Link's background to be slightly green and zelda to be slightly blue.
In css/link/theme.css:
body {
  background-color: #2c3227;
}
In css/zelda/theme.css:
body {
  background-color: #020f17;
}
Now when we look at our build, we see the themes are output as separate chunks. They have an additional -css but that's not a deal-breaker for me.
Now, there are a couple of ways to get this into our final render. In render.js at the bottom under the ${js} line, let's insert our new stylesheet:
  ${js}
  <link href="/css/${site}-theme-css.css" rel="stylesheet">
</body>

What about FlushChunks tho?
This hardcoded link tag is a little lazy. FlushChunkNames is really just an array of our chunk's. If we set a debugger, we can see that. So, since we have the site information. Let's use concat to add this extra chunk, and let flushChunks handle the css output for us.
In render.js:
const site = req.hostname.split(".")[0]
const context = { site }
const names = flushChunkNames().concat([`css/${site}-theme-css`])

const { js, styles } = flushChunks(clientStats, {
  chunkNames: names
})
Now we get it in our styles. And it's output in the html, after the rest of the css, so it properly cascades and overrides any other settings. We'll use that in the next article.
In Sum
In this article we hooked a new stylesheet into the mix for theming purposes. To show how we can use the import function.
I notice the hot reloading dies when we use the import function. We have to reload to see changes. Can't have everything when you're living on the edge.
git checkout theming-css-final
Up Next
Next we're going to build out the Article pages for our heroes a bit, so we have 2 full working examples.