Analyzing Webpack Bundles and the CommonChunksPlugin
In this article we're going to look at optimizing our javascript bundles a little better by separating out code that's used in multiple places from code that's only used once.
We're going to start where we left off in the last article.
If you need to catch up:
git clone https://github.com/lawwantsin/webpack-course.git
cd webpack-course
git checkout split-chunks
npm install
Bundle Analyzer
Now that we've added a bit more code to our project, we're going to add a package that allows us a better look into our bundle. AS always we start at the terminal:
npm install webpack-bundle-analyzer
In our webpack.dev.js let's to the usual thing of requiring at the top and including in the plugins array.
const BundleAnalyzerPlugin = require('webpack-bundle-analyzer').BundleAnalyzerPlugin;

...

plugins: [
  ...
  new BundleAnalyzerPlugin({
    generateStatsFile: true
  }),
]
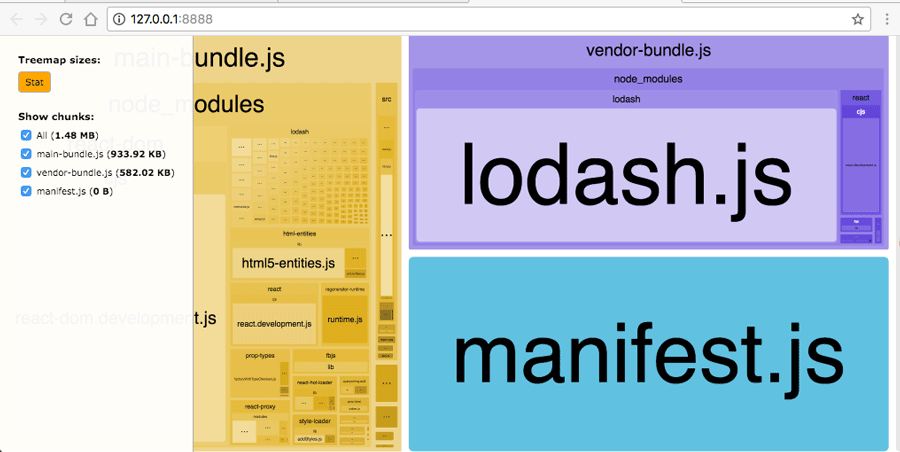
We're adding a generateStatsFile option to create a dist/stats.json file. It also starts a server and opens a browser window. There are options to turn that off if you'd like. So what'd we get:
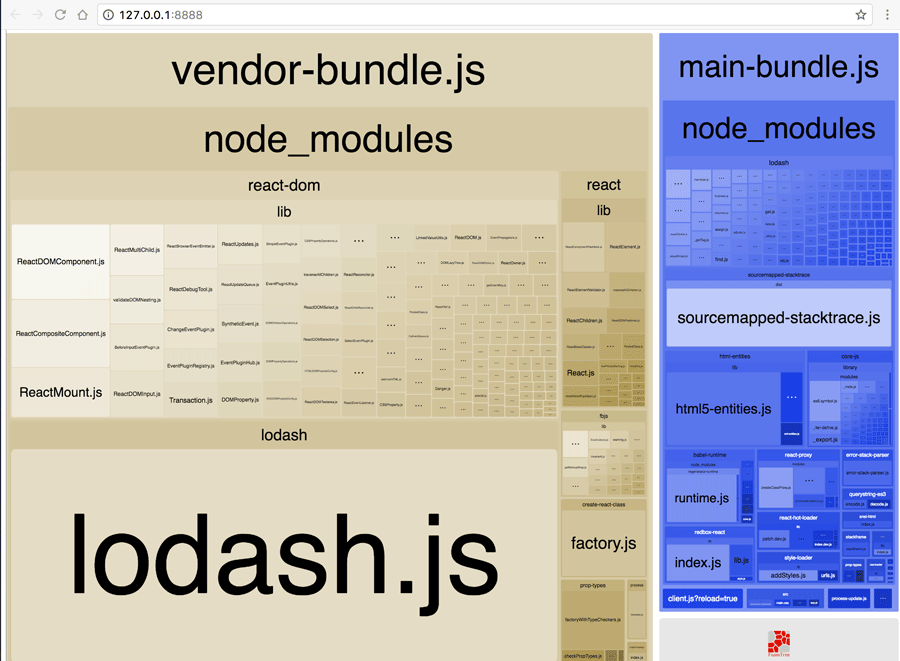
Looks like it correctly reports that everything is in one big chunk. Let's quickly make another chunk with some of the vendored code that's not likely to change as often.
In webpack.dev.js add the following above module.
optimization: {
  splitChunks: {
    chunks: "all"
  }
},
So we separate out react, and react-dom. So cool. Now we're about to see the chart has updated and opened a new window. Our main-bundle is smaller, our vendor bundle is there. If we hover we see the files included by a certain module are highlighted in a bounding box. When we reload the page, we can see the HTMLWebpackPlugin has automatically inserted both files in our index.html.
new BundleAnalyzerPlugin({
  generateStatsFile: true,
  analyzerMode: "disabled" // static
})
Hashing and Caching
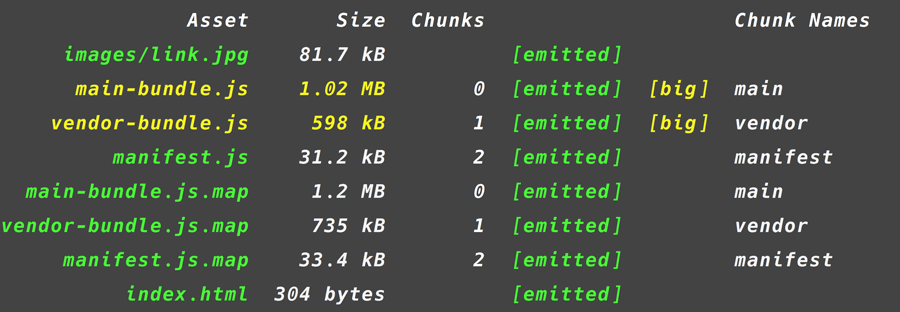
We see a new bundle is output, that's only 31kB. This is the webpack base code. Place it before all other bundles or let the HTMLWebpackPlugin inject them for you.
In Production
Of course, any analysis of bundle size is more helpful in production than in development. So let's port out changes to our webpack.prod.js.
In webpack.prod.js:
optimization: {
  splitChunks: {
    cacheGroups: {
      vendor: {
        name: "vendor",
        chunks: "initial",
        minChunks: 2
      }
    }
  }
},
In the entries:
main: [
  "babel-runtime/regenerator",
  "babel-register",
  "webpack-hot-middleware/client?reload=true",
  "./src/main.js"
]
other: [
  "babel-runtime/regenerator",
  "babel-register",
  "webpack-hot-middleware/client?reload=true",
  "./src/main.js"
]
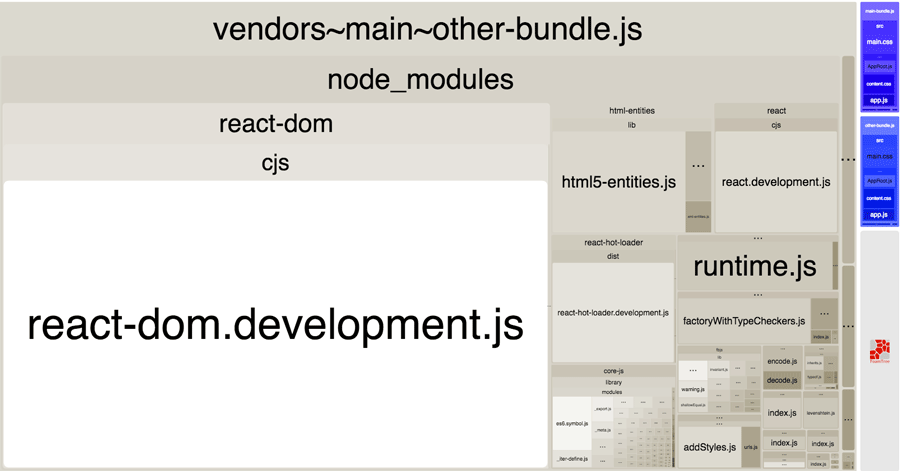
And inside the plugins, you can specify more than one instance of the plguin and give them different filename and chunks options to include only the javascript you need on each page:
new HTMLWebpackPlugin({
  template: "./src/index.ejs",
  inject: true,
  title: "Link's Journal",
  chunks: ["vendor", "main"]
}),
new HTMLWebpackPlugin({
  template: "./src/index.ejs",
  inject: true,
  filename: "other.html"
  title: "Other Page",
  chunks: ["vendor", "other"]
}),
Initial Chunk
optimization: {
  splitChunks: {
    automaticNameDelimiter: "-",
    cacheGroups: {
      vendor: {
        test: /[\\/]node_modules[\\/]/,
        chunks: "initial",
        minChunks: 2
      }
    }
  }
},
Webpack Stats File
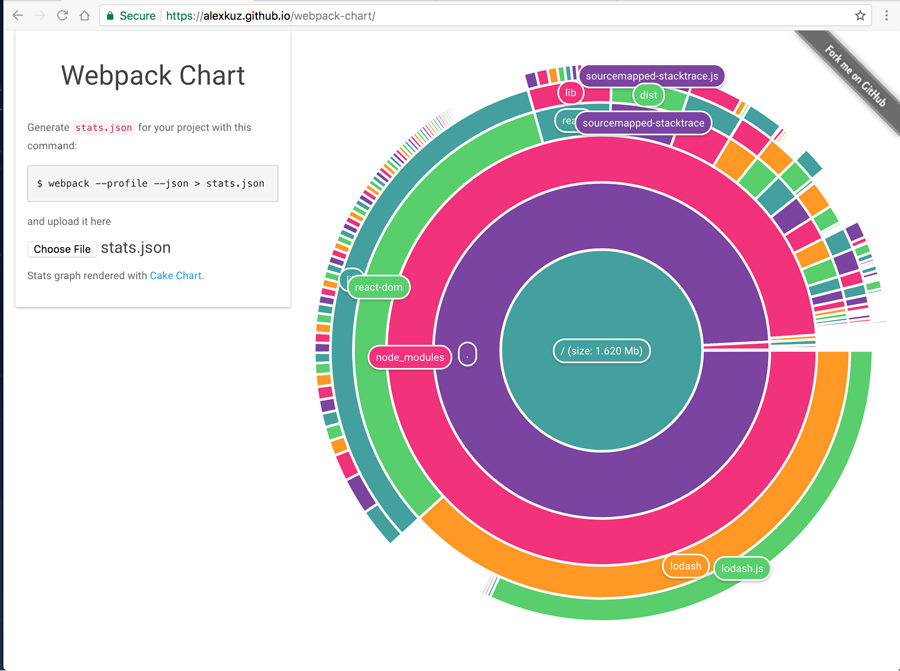
We can visualize the webpack bundle in a few different ways. The previous example uses FoamTree to visualize. There's also the following. I don't think they're as useful to look at but you might.
https://alexkuz.github.io/webpack-chart/
It's also possible to pull the stats out of a webpack configuration from the terminal:
webpack --profile --json > dist/stats.json
This kind of thing can be automated and put into a CI step to ensure we're not changing our bundles in unforeseen ways when we add a package. The stats object will come in handy in later episodes when we're including our assets in a server side render.
In Sum
In this episode we prepared for further work we're going to do in terms of bundle optimization and planning, by giving ourselves a window into the way webpack combines files, we're free to use the more advanced features of bundle splitting.
git checkout split-chunks-final
Up Next
In future episodes we're going to get into code-splitting and aggressive chunking for HTTP/2 deployments. We're going to do so using a couple of different Routers. Coupling this with Server side rendering is the latest and hardest dragon the Webpack community has slain.